Kampereen K4 Tent Camper Build
Last week I started the Kampereen K4 tent camper build following the design changes I mentioned in the previous post. Turning the opening 90 degrees counterclockwise will resolve the last couple of issues with the design.
Easier to build
I’ve already found that this model is easier to build. One of the complicating factors with K3 was the fact that the cargo base was 1” shorter on the hinged left side to fit flush when it was stored and then allow room for side to swing down when the camper was opened up. This meant all my measurements involving the base had to account for this. Tongue placement was not centered, but 22” from the right, 21” from the left. Wheel well holes were different by an inch.
That doesn’t sound like a big deal, but it added a factor you had to account for until the cargo base was fully assembled. In building the second K3 camper, I found I had attached it to the sides in the opposite manner as the first build, which put the camper opening on the right inside of the left. The symmetrical design of the base on this build means that either side can be face up. The base of the camper is still 1” shorter, but it is on the rear now because the rear panel is the one that opens. That is a lot easier to deal with.
Better tracking
Besides turning the opening, the other big change (and the reason for turning the opening) was to move the wheels fully to the outside edges of the box. The wheel base is now 42” on a 44” width. This will eliminate any tracking issues caused when a short wheelbase vehicle (motorcycle) makes an instant 90 degree turn, like at a stop sign, for example.

I’m not sure if the 935 lb axle stubs have a different start angle than the 500 lb. stubs, but using the exact same dimensions for the start and length of the wheel well opening got me a different result. I had to cut an additional 2” length at the start of the opening. I haven’t yet figured out why.

The wheel well depth was also too small by about a half inch. I also had to cut a small semi-circle in the cargo box sides to allow room to get the wheels on and off the hubs. At first I was pissed at the extra work involved (not surprised, just pissed), but after making the mod to the sides, I think I actually like it better. The curve of the wheel wells breaks up the boxiness and if it’s done at the start of the project, it won’t add more than a few minutes. So I think I’ll keep that.
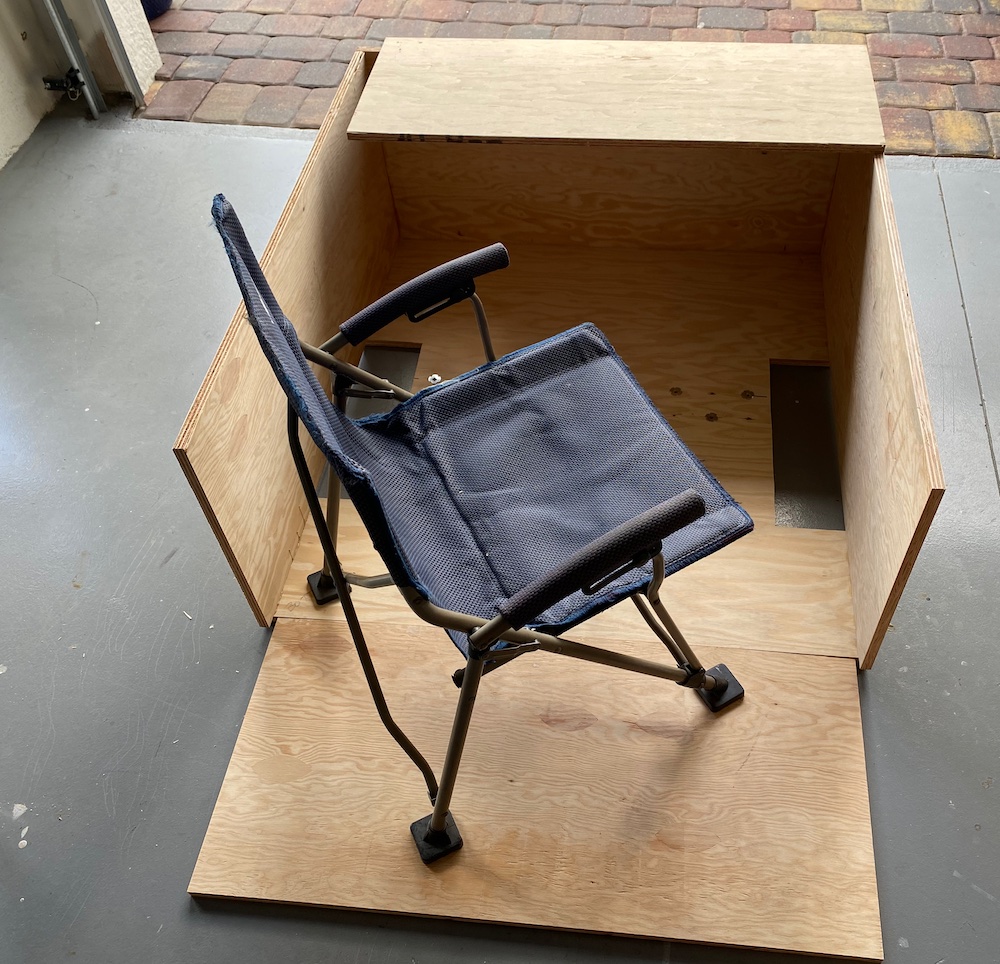
More usable interior room
Another plus is that I can already tell the inside space will be more usable. Turning the opening means putting the wheel wells to the sides of the interior. No more wheel well in the middle of the space. With the sleeping space now oriented along the length of the camper (48”) versus the width (42” in K3), the lower part of the camper can be reduced by the same amount, creating more room in the sitting area.

Next steps
The very next thing to do is to mount the top and the rear panels and take it out for a test run to see if I can tip it. Assuming that I can’t, then I can get to the next part of the build. That will include making all the support bows and adding the leveling legs. When that’s done, I’ll build the lower movable bed section and do a provisional installation just to check the fit. The tent dimensions will be a little different, so I’ll need to figure that out prior to starting the tent making. Then, final assembly and all the finishing touches.
Questions?
For more information about this camper you can contact me through this page.
My business is selling motorcycle campers and trailers and the gear you need to tow them with a motorcycle or trike. I run two sites: Open Road Outfitters and US Hitch.